A journey is a set of actions that have been defined to reach a certain goal. If the user performs or doesn't perform such actions on your website, then based on that, communication triggers can be configured. They will receive the messages via different channels, thus influencing them to make conversions and reach the goal.
NotifyVisitors journey builder enables you to create campaigns and engage users with them based on their actions and stages. The main objective of the journey builder is to create an omnichannel message experience.
NotifyVisitors allow you to create a journey based on different logic and conditions for entering and exiting the users in a journey. NotifyVisitors offers two types of Journey:

Workflow Journey: In a workflow journey, you can create logic-based journey workflows with a drag and drop editor and engage customers with multichannel campaigns based on the user's activity.
Sequence Journey: In sequence journey, you can create a sequence of stages with the help of a drag and drop editor, based on which the user receives messages via different channels.
How To Create A Sequence Journey In NotifyVisitors:
Follow the below steps to create a Sequence Journey:
1. Navigate to the Notifyvisitors dashboard> Journey, Click on the CREATE NEW JOURNEY.

2. Select the Blank Template. Click on CREATE SEQUENCE and begin with creating a journey. Assign a name to the Journey. Click on the Submit button and move further.

Let's understand with a use case :
Suppose you are creating a journey for users who have placed orders. So, Order Place is the main event in the Journey.
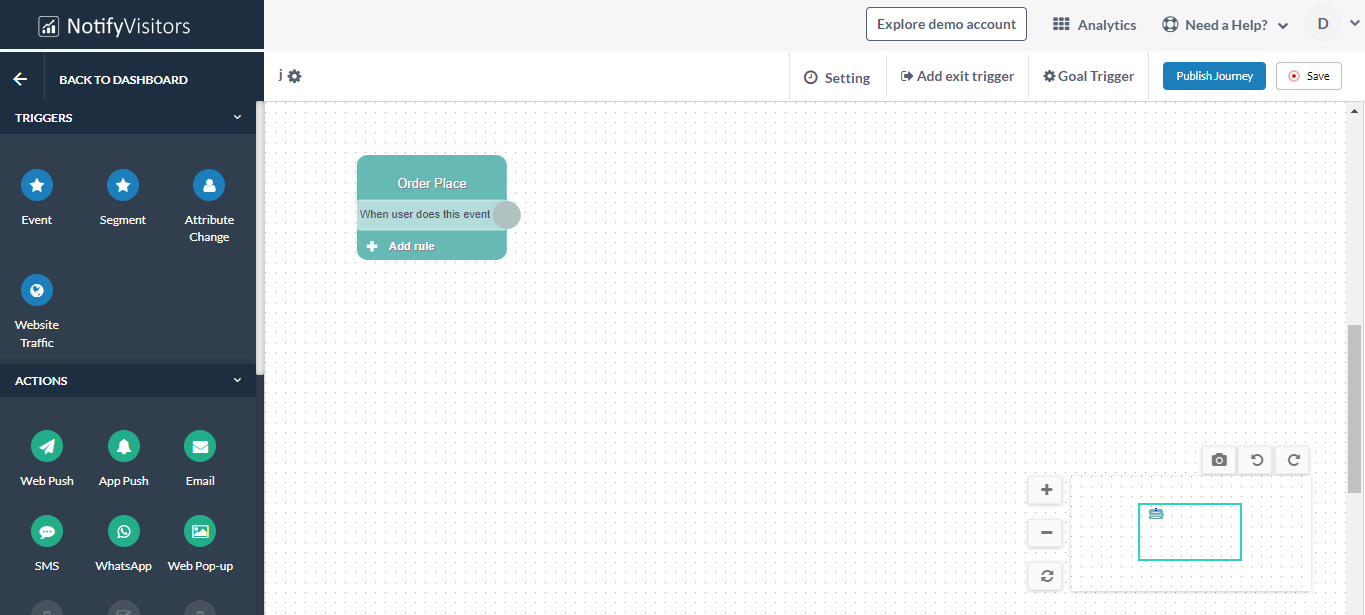
You can drag and drop the EVENT block and select Order Place as the main event.
Note: You can optionally add filters on Event Attributes to send targeted communications.
Now, if you want to create this journey for a specific product category then select the product category in the first dropdown. In the second dropdown, decide whether you want to include or exclude certain products. Depending upon the second dropdown selection, you can pick products in the last dropdown.
All you have to do is determine the conditions and decide for which products you want to send the campaigns.

Once you are done with the conditions, determine when you want to trigger the communication. For instance, if you choose Any of these that means fulfilling any two conditions will trigger communication, but if you choose All of these that if a user fulfilled all the conditions, only then further communication will be triggered.

In the above screenshot, as you can see, a user enters the journey when he orders a tennis ball and you send him similar product recommendations through push notifications. If they view it, you can send them an email campaign like Lucky You to prompt them after one day along with some discounts.
There are more use cases where Sequence journey can help you out
1. Welcome Email Sequence: Use this to welcome your new customers.
2. Onboarding Email Sequence: Use this to continuously engage your new customers
3. Email Sequence for repeat customers: Use this sequence to re-engage your repeat customers.
4. Re-engagement email sequence: Use this sequence to re-engage your past customers.
The sequence journey features enable you to engage users across multiple channels based on what actions they are performing. There is not much logic defined for the same, and you can create a journey and engage users with different campaigns such as email, SMS, web push, or app push.
Was this article helpful?
That’s Great!
Thank you for your feedback
Sorry! We couldn't be helpful
Thank you for your feedback
Feedback sent
We appreciate your effort and will try to fix the article