As technology develops, there are numerous methods to incorporate digital tools into different tasks. Webhook is one such tool developed and included in their software so that clients can use these tools to improve their business operations, productivity, and other aspects of their professional lives. NotifyVisitors includes Webhook as a great tool which clients can use to automate their operations and perform tasks with utmost efficiency.
What Is A Webhook?
A Webhook is a tool web applications use to communicate with each other. Webhooks make it possible to transfer real-time data from one application to another when an event occurs. Depending on the particular event, an application may transmit different data types via Webhooks. A purchase, an abandoned cart, or a comment are a few examples of things that could trigger a Webhook.

Through a Webhook URL, data is transferred from one application-to another. A URL will be used by the event's application, much as a phone number, to notify the receiving application. Typically, the URL contains data in XML or JSON format.
NotifyVisitors enables you to set up Webhooks so that you can manage the business workflows easily. Also, you can now create Webhooks in a Journey and run a Journey. Further, you can view the Webhook analytics in the NotifyVisitors panel itself.
How To Setup A Webhook In NotifyVisitors Dashboard?
Setting up a Webhook over NotifyVisitors dashboard is quite an easy task for a client. The following are the step to create a Webhook:-
• Click on setting from the notify visitors panel.
• Look for Webhooks under the channels head.

• Click on Webhooks.
• Then click on create a Webhook.

• A new modal will appear where you will have to enter details to create a Webhook: -
⇢ Status: Choose the status of Webhook (active or inactive)
⇢ Name: Fill in the name of the Webhook you want to create
⇢ URL: Put in the URL source to which you want to share data
⇢ Basic Auth: Put in the basic auth (i.e. the username and password)
⇢ Headers: Enter the header(s) i.e., the key and the value assigned. Also, you can add multiple headers to the Webhook.
• After entering the details, click on the submit option.
• You can create multiple Webhooks and a list of those will appear under the Webhook Head.
• Each Webhook created contains an action to edit or delete a Webhook: -
⇢ To edit a Webhook, click on the edit option of the Webhook you want to edit, make the changes and click on update.
⇢ To remove a Webhook, click on the delete option on a Webhook. A dialog box will appear for confirmation. Then Click on delete.
Thus, you can edit or delete a particular Webhook as per your requirement.
How To Setup Webhooks As An Action In The Journey In NotifyVisitors Dashboard?
An “action” is one of the steps in creating a Journey over the NotifyVisitors dashboard. NotifyVisitors provides its clients with an “actions” feature that allows you to engage users in their Journey. The actions head contains Webhook as a channel that can be used for the effective flow of information.
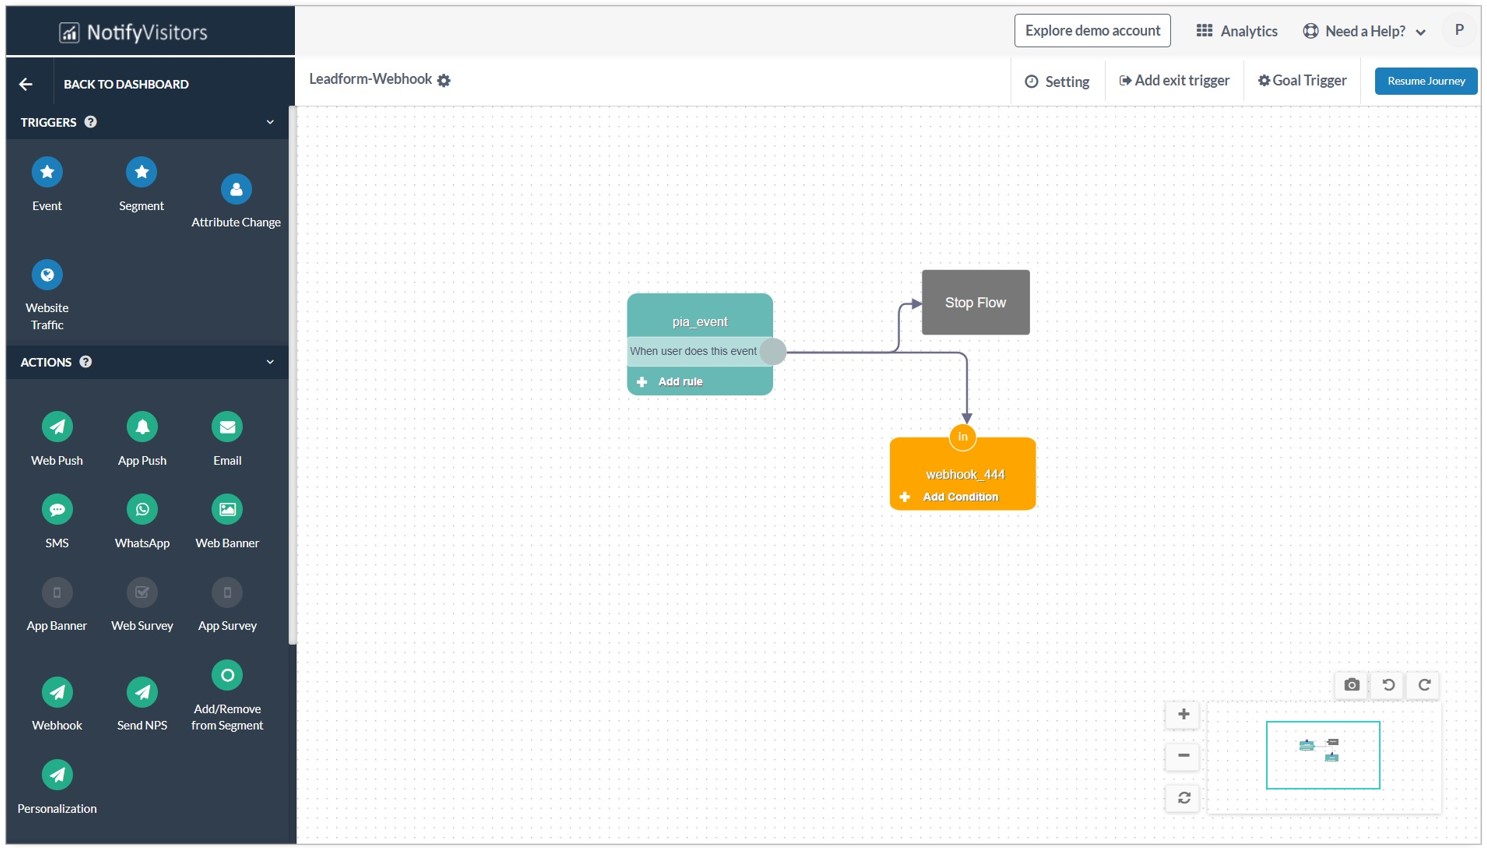
On the NotifyVisitors dashboard, suppose you create a Journey and add users. Then you set the triggers to create user Journeys and now is the time to engage them using actions.
Configure webhook as an action:-
For example - If you have entered the users in the Journey based on the event i.e., app installation, subscription, and add to the cart. You might send them with Webhook action. A Webhook action can be easily set as an action in the Journey by following the steps below:-
• Drag and drop the Webhook block, create a new Webhook, or edit the existing one.

• If you create a new Webhook campaign, a new page will appear where you have to enter the details of the campaign.

1. Assign a name to it.
2. Then, Select one of the Webhooks created in Settings above.
3. Enter the URL key-value pairs.
4. Select the Webhook content format (JSON/ plain text).
When a specified event occurs, NotifyVisitors Webhook sees the event, collects the data and sends it to the URL specified by you in the form of HTTP callback request. The callback is triggered when a specific event happens in the Webhook head about which it wants to notify the other system.
NotifyVisitors further provides you with content formatting like the kind of event you want to be notified about, the format of data etc. Whenever NotifyVisitors acquires a lead and has to communicate the data to the client, in this situation, using Webhook is helpful and aids in transferring data fast and easily.
How To View Webhook Analytics On NotifyVisitors Dashboard?
NotifyVisitors provides their client with the feature to view the Webhook Analytics. Here you can monitor the number of hits made to Webhook along with the Success and Failure count Automated. You can easily see the Webhook Analytics by following the below steps:-
• Go to the Journey over the NotifyVisitors dashboard.
• You will see the list of created Journeys.
• Click on the “more” option available just after the name of the Journey.
• A drop-down screen will appear.
• Click on the Analytics option to view the statistics of a Journey.

• You can see the Webhooks under the campaign comparison head.
• Now click the Graph Option available next to webhook.
• The following screen shall follow, depicting the webhook overview.

• Click on the Date Filter option and enter dates as per your requirement.
• Further, you can click Graph Type and choose from the options.
The webhook analysis shows the number of Webhook hits (sent), the successful hits, and the failed hits during the particular dates which you have entered.
Thus, Webhook analysis will help you make data-driven decisions and refine strategies.
Was this article helpful?
That’s Great!
Thank you for your feedback
Sorry! We couldn't be helpful
Thank you for your feedback
Feedback sent
We appreciate your effort and will try to fix the article