Emails have become inevitable in today's business world. Companies use emails to gather and nurture leads, communicate with customers and clients, and relay important information to co-workers. Therefore, using the right and most attractive email template in your email campaign is crucial. NotifyVisitors allows you to create customized templates to engage customers effectively.
Table Of Contents
Choose Templates From The Library
To use an email editor while creating an email campaign, you have to follow a few steps.
Navigate to NotifyVisitors Dashboard > Campaigns > Email given under the Reach Users Via category.
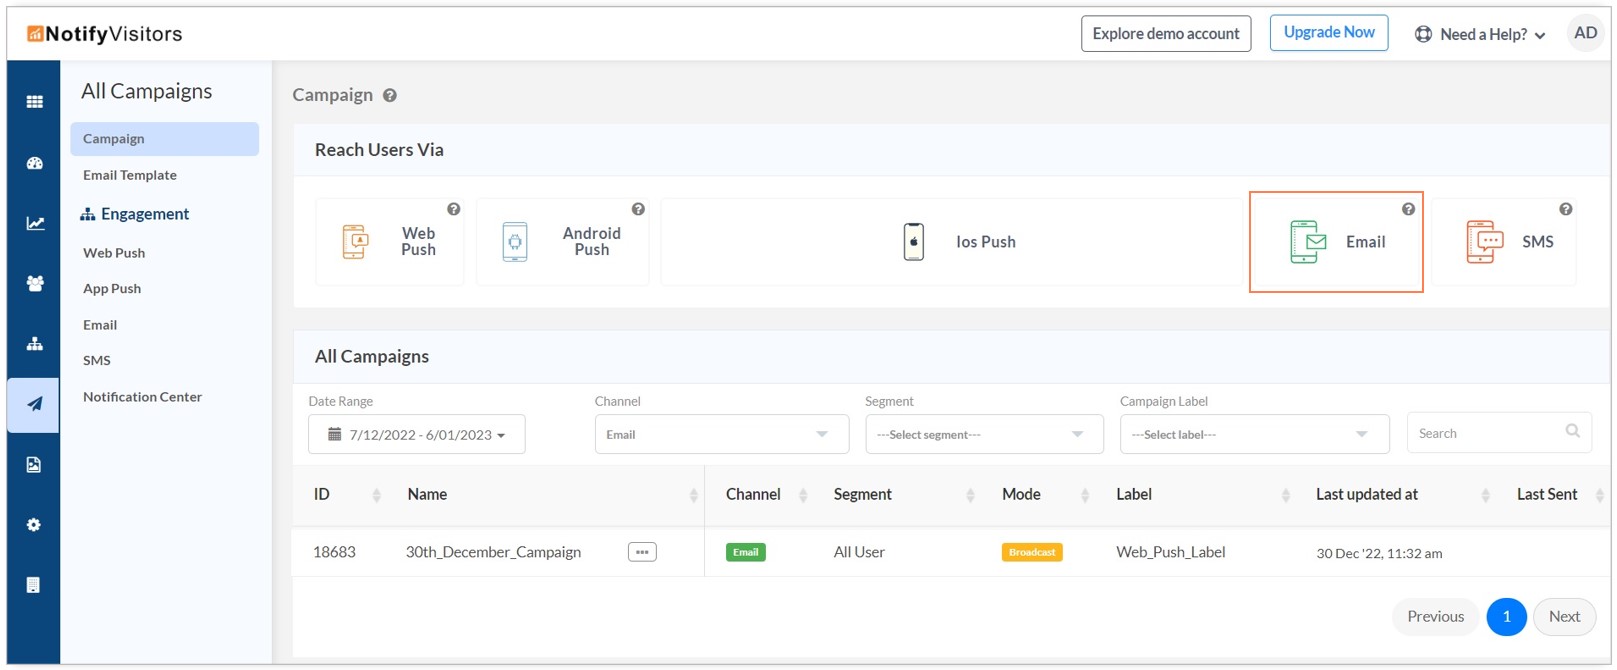
Now, enter all the required fields on the Recipients page and then click on 'Continue To Content'.

On the content page, scroll down and you will find the drag & drop editor feature.

Choose Templates From The Library
In the templates library, you will find various types of templates to build your campaign.
Advanced Themes
The advanced library has a number of templates designed to visually engage customers. All you need to do is select a layout that suits your messaging needs, customize the text, color, font images, buttons, and links, and much more.

Also, you can choose a blank template to edit and build upon to create the ideal layout. All you need is to select a template that aligns with your requirements, customize it by adding text, video, image, and button blocks and much more.
My Templates
This section comprises all the custom layouts that you had created and saved for future use. You can reuse email templates to further create similar designs.
Using The Drag & Drop Editor
In templates you will find the three tabs: Content, Rows and Settings.
Content And Rows Tabs
These sections allow you to customize the template as per your requirements. They offer numerous options. You can use the different kinds of content in your design. To use them, all you have to do is just drag one inside a column, it will auto-adjust to the column. You can insert all the structural elements you require to design, regardless of the template you chose when you started. Also, you can add multiple Row Blocks to an email template as per your requirements. Each Row can contain several Columns, and each Column has an element like text, image, link, button, and so on.

You can arrange and adjust Content Blocks under Rows and Columns so that you can design customized templates.
Settings Tab
Design settings are inherited by Structure and Content blocks. You can adjust the content alignment, fonts, background color and much more, making it useful for creating a coherent design quickly.

Let’s have a look at all the features of the Drag & Drop Editor:
Customizing A Template
Here you can select the block and delete it using the bin icon. Likewise, you can duplicate the existing block by using the Copy icon. Now, you can use the duplicate block by shifting it to the desired place.

Personalizing The Message
You can easily personalize your message as per customer name, location, language etc by using personalized tags. Click here to know more.

Hyperlinking Text
Hyperlink allows you to redirect users to any other page or tab. For instance, you can add a hyperlink to CTA, where you can direct your customers towards product pages or even let them download your e-book.

Adding Buttons
Adding Buttons strategically to your Email is a great way to grab a user's attention and prompt them to perform the desired action. For instance, you can encourage users to read your new article, avail of a special offer, buy products, renew a subscription etc.

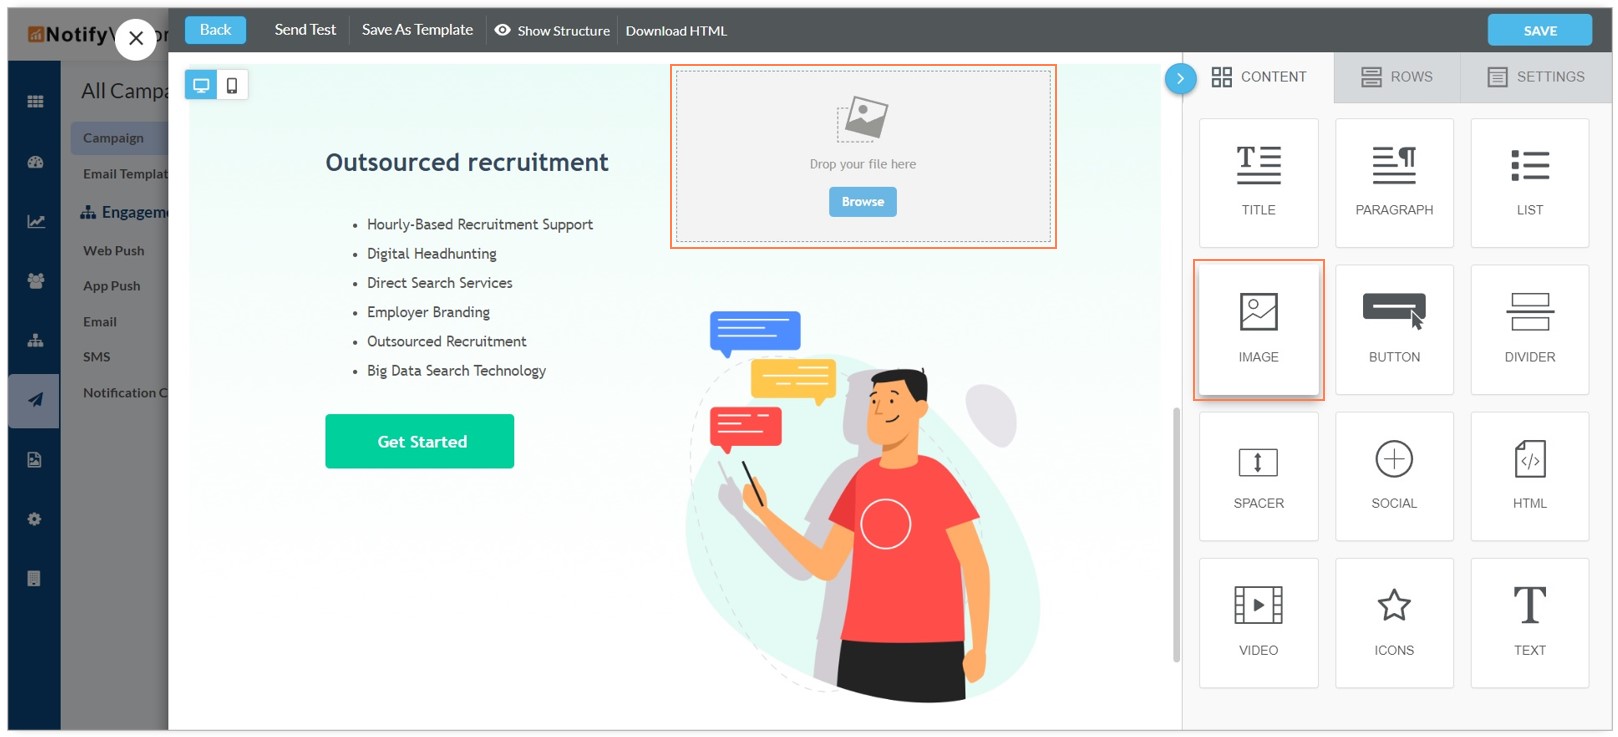
Adding Images And Videos
You can easily add an image or video to your email template by replacing an existing image / video in your template or adding the Image/ video block. You can add a YouTube or Vimeo link through the right panel.
Adding Custom HTML
Adding custom HTML code snippets help you customize your template by adding additional sections like custom headers, countdown tickers, personalized offers, surveys, collecting ratings and so on.

Adding Dividers
Dividers are small blocks of space that allow you to create different sections in your template. Next, you can edit dividers Content Properties like color, style, width, transparency, block padding, alignment, and so on.

Adding Social Media Icons
Drag and drop editor allows you to add all the popular social media platform icons and styles to help you configure their appearance. You can easily link an Icon and configure its alternate text through each platform's settings, using Content Properties in the right panel.

Adding Unsubscribe Link
The most important step of email campaign creation is adding an unsubscribe link to your email. It helps users to unsubscribe if they do not wish to receive your mails and also prevents your mails from landing into the spam folder. Click here in order to learn more about the email unsubscription flow.

Preview Mode
You can easily preview the template on a Desktop and a Mobile device by clicking the Preview icon. It helps you see how your campaign will look on both the desktop and mobile.

Send Test
This feature comes handy to test the template as it allows you to check how it will appear in the email.

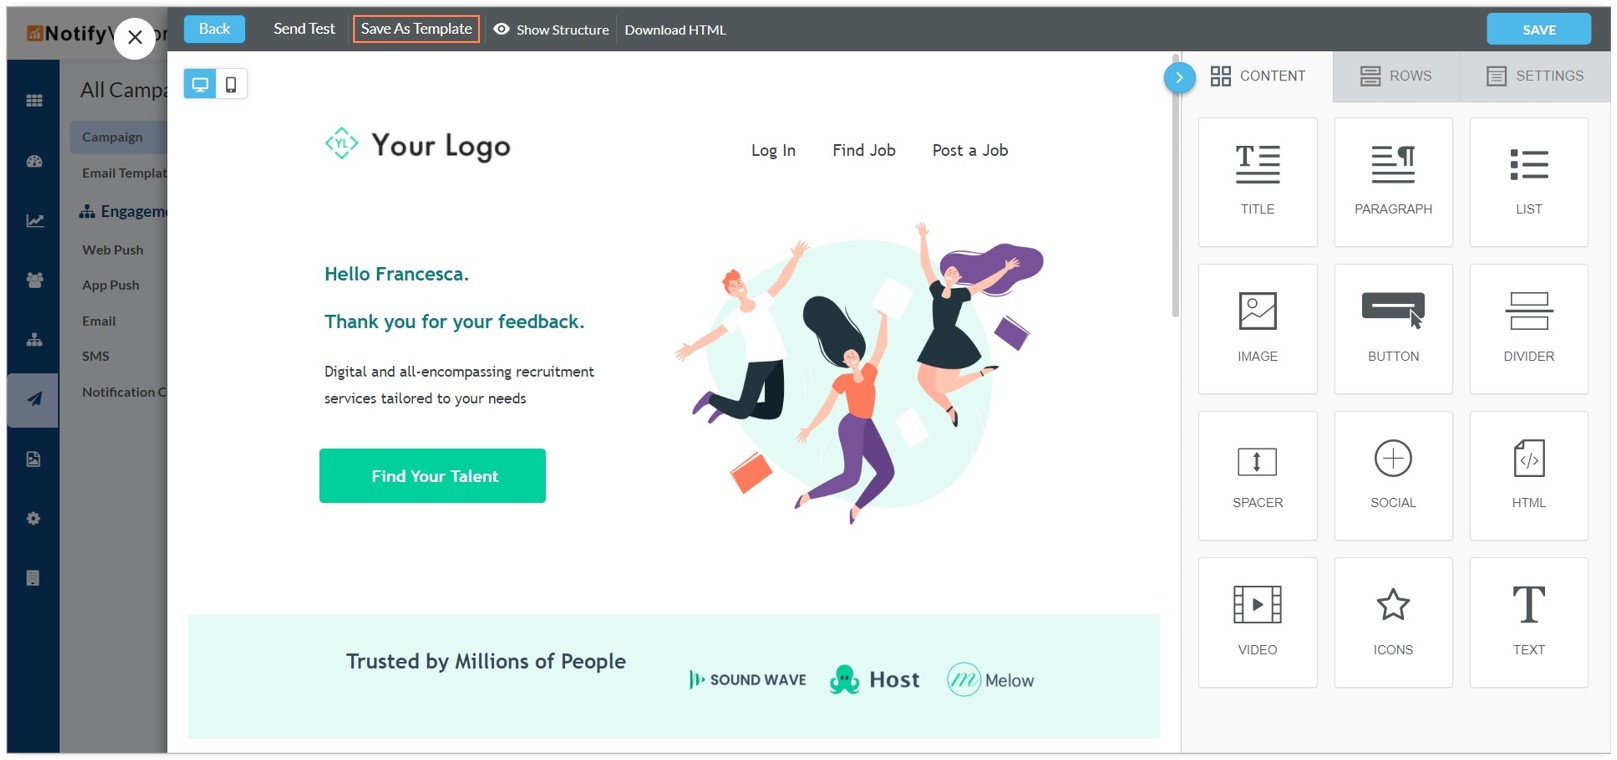
Saving As Template
Once you have created the template, you need to click on the Save icon. You can save it by adding a name that helps you identify it.
Show Structure
Show structure feature helps you visualize the complete template structure. When the show structure feature is applicable, it reflects as Hide structure in the header.

Download HTML
This feature comes in handy if you want to download the template for further use.

This is how you can use Email Editor and design your templates the way you like.
Was this article helpful?
That’s Great!
Thank you for your feedback
Sorry! We couldn't be helpful
Thank you for your feedback
Feedback sent
We appreciate your effort and will try to fix the article