In today's data-driven world, protecting sensitive user information is of paramount importance. Businesses collect a wealth of user data to enhance their services, but with this comes the responsibility to safeguard personal information. NotifyVisitors, a cutting-edge platform for user engagement and analytics, recognizes the significance of data privacy and security. That's why we have introduced a valuable feature called PII masking, allowing organizations to shield sensitive user details from specific employees to limit their access towards the same. In this comprehensive guide, we will delve into the ins and outs of PII masking in NotifyVisitors, providing you with a step-by-step walkthrough and situational examples.
What is PII masking
PII, or Personally Identifiable Information, includes any data that could potentially identify an individual, such as names, email addresses, phone numbers, and more. PII masking is a security measure that allows organizations to hide or mask these sensitive user details from certain users or roles within their NotifyVisitors account. It adds an extra layer of control and security, ensuring that only authorized individuals can access such information.
How does PII masking work in NotifyVisitors
PII masking in NotifyVisitors is a powerful feature that grants administrators the ability to control who can access sensitive user information and under what circumstances. Here's a detailed look at how it works:
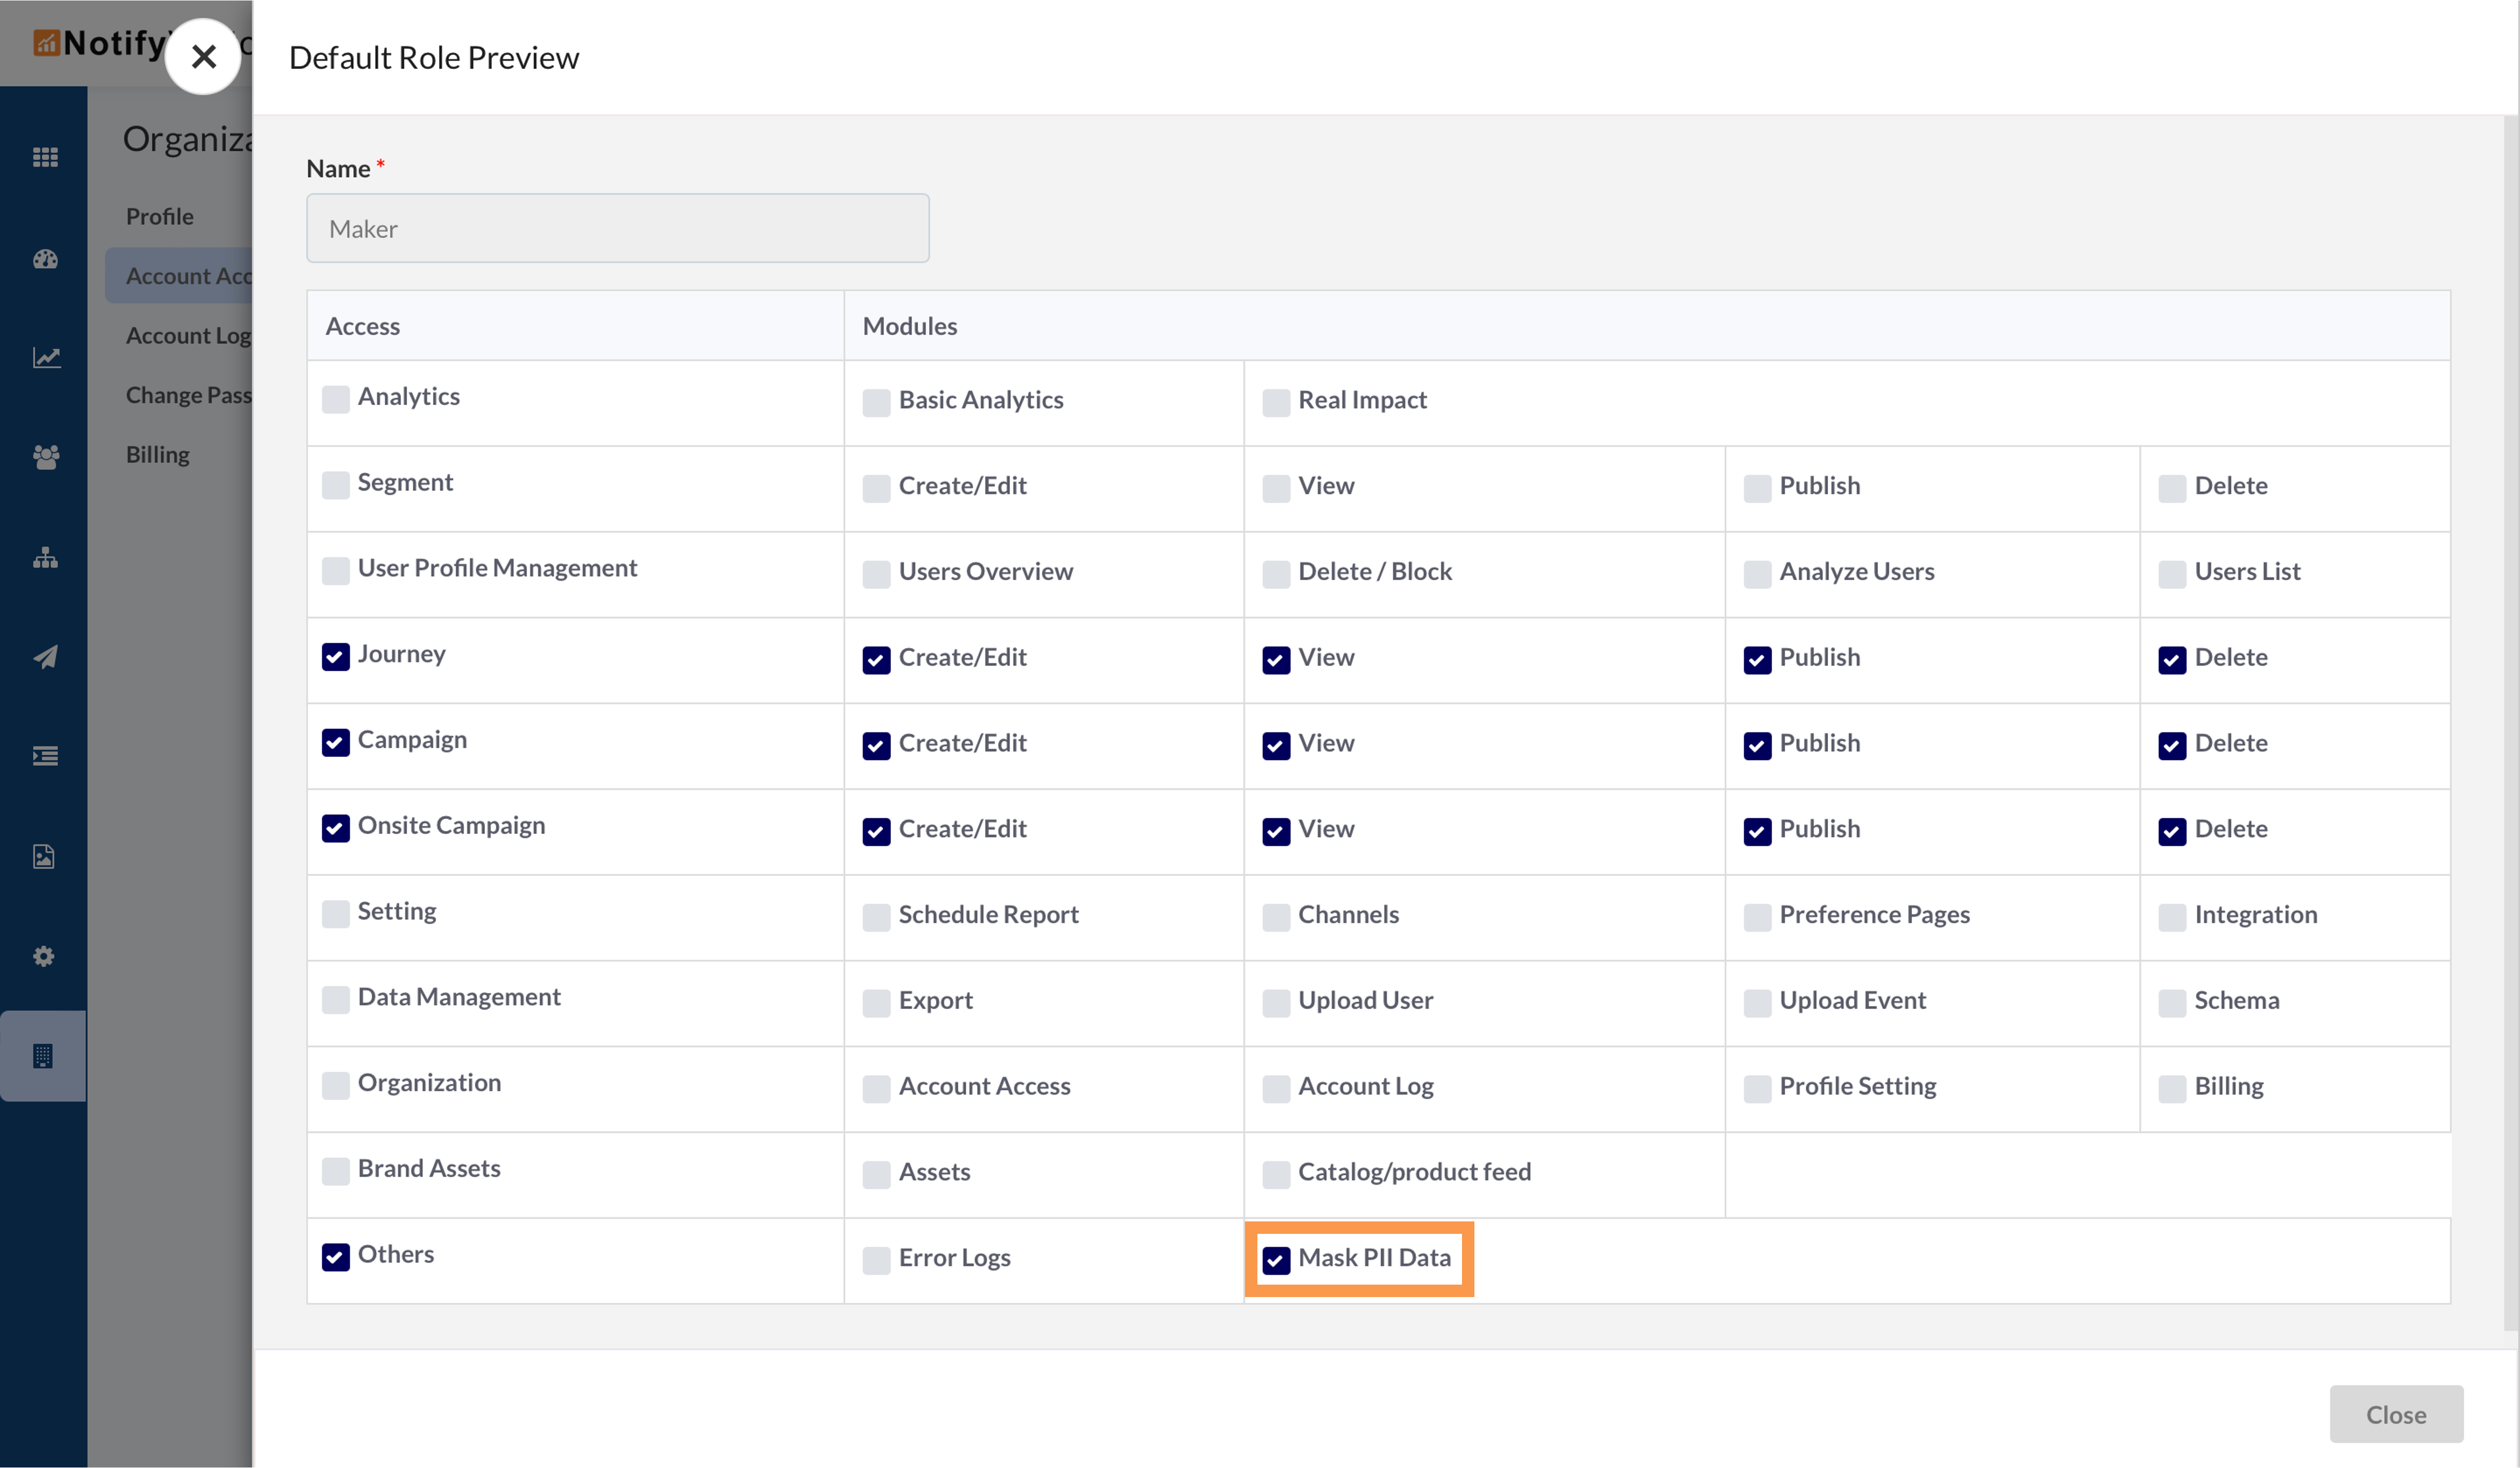
1- Default roles
NotifyVisitors provides a comprehensive role-based access control system, which serves as the foundation of PII masking. Navigate to NotifyVisitors Dashboard > Organization section > Account access > Roles. Here you can assign default roles such as admin, manager, maker, and more.

NotifyVisitors provides various roles with specific permissions, designed for organizations:
Admin: Full access to Campaigns, Data Management, Onsite Campaigns, Segments, User Profile Management, Journeys, Organization settings, Analytics, Settings, and more, including Brand Assets.
Manager: Similar access to Admin, except for the ability to manage Organization settings.
Maker: Limited access to Campaigns, Onsite Campaigns, Journeys, and some other functionalities categorized as "Others."
Analytics: Focused on Analytics and Settings, with access to other features under "Others."
No Access: Minimal or no access to most functionalities except "Others."
This allows you to define who has what level of access to your account based on their responsibilities and functions within the organization.
2- Custom roles
Beyond the default roles, NotifyVisitors allows you to create custom roles tailored to your specific needs. Custom roles enable fine-grained control over access permissions, ensuring that different team members have the appropriate level of access to perform their tasks effectively. Here are the steps to create a custom role -
- Navigate to organization tab over NotifyVisitors Dashboard
- Click on “Account Access” and select “Roles”
- Now click on “Add New Role”
- A new screen will appear where you will have to input the name and assign access for the role as per your requirement.
- Here, you can click on the "Mask PII Data" option to hide user ID, email addresses, and phone numbers from the custom role you're setting up, preventing access to sensitive user information.You can activate PII masking while creating a custom role or make changes later by using the edit option in the roles section.
Note
PII settings cannot be modified for default roles.
The picture below shows 2 custom roles - Analyst and Marketing Analyst. You can click on the edit option attached to a custom role and enable the PII masking to hide sensitive data.

3 - Mask custom attributes as well
NotifyVisitors recognizes that user data can be much more than just the default attributes. Many organizations use custom attributes unique to their operations, such as user behavior data, purchase history, or demographic information. Admins have the authority to enable PII masking for these custom attributes as well.
Steps to enable PII masking for custom attributes:
- Navigate to the Settings section.
- Select Users.
- You will find a list of your custom attributes.
- If you are logged in as an admin, you will see an “Is PII” option next to each custom attribute.
- Simply activate this option for any custom attribute where you want to apply the mask.

How masked data appears in NotifyVisitors?
If a user with a role that has PII masking enabled views data in your NotifyVisitors account, the user ID, email address, phone number, and any custom attributes will be masked. In this case, all corresponding fields will be replaced with "X," as depicted in the provided image.

Downloadable reports
In addition, if a user subject to PII masking restrictions downloads reports, the masked data will remain concealed. This ensures that even when data is exported for analysis or other purposes, sensitive information remains protected.
Conclusion
PII masking in NotifyVisitors is a powerful tool that enables organizations to strike the right balance between data access and data security. By following the steps outlined in this comprehensive guide, you can effectively protect sensitive user information, enhance data privacy, and bolster overall data security within your organization. As data privacy regulations continue to evolve, PII masking remains a crucial component of a robust data protection strategy. Embrace this feature in NotifyVisitors to ensure that your user data is in safe hands, and you are compliant with the ever-changing landscape of data privacy.
Was this article helpful?
That’s Great!
Thank you for your feedback
Sorry! We couldn't be helpful
Thank you for your feedback
Feedback sent
We appreciate your effort and will try to fix the article